// Technology log
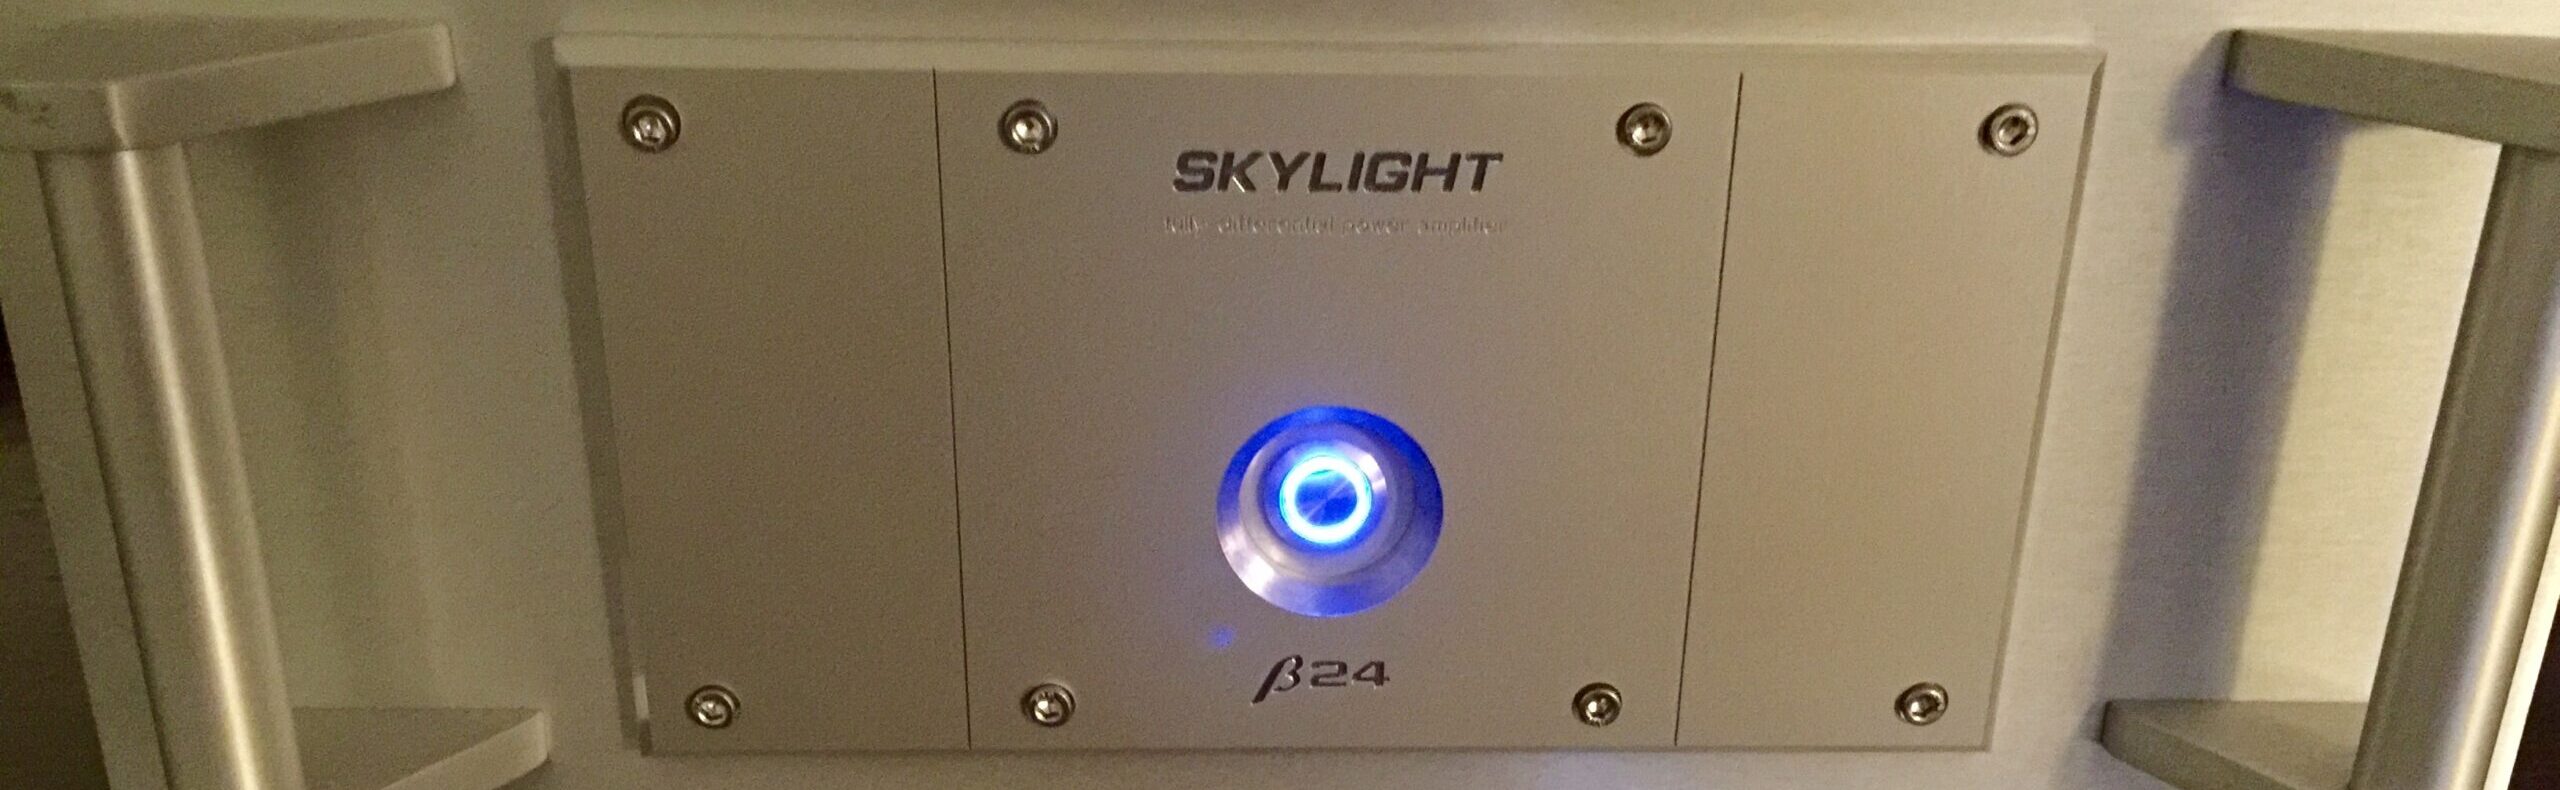
Building the AMB Beta24 power Amp
STATUS: BUILT x 2
CATEGORY: AMPLIFIER
YEAR: 2015
THE MISSION: POWER WITHOUT THE PRICE
Workbench Stories: Building the AMB Beta24 power Amp
The whole reason I got into building the AMB Beta24 comes down to a few face-to-face chats I had with the designer, Ti Kan. I was traveling to Sunnyvale, California, a few times for some other things, and we managed to link up. If you've ever looked at AMB Labs designs, you know Ti is meticulous. Talking through the circuit philosophy with him directly made me realize this wasn't just another standard amplifier project, it was a true no-compromise discrete design.
By the end of our meetings, I knew I had to build one. I ordered bare PCBs straight from the source. The boards themselves are beautifully laid out, heavy-duty, and thick. But looking at them on the desk back home, the reality of the project set in. This wasn't going to be a quick weekend solder job; it was a serious commitment.
1.1 // THE ARCHITECTURE: NO SAFETY NET
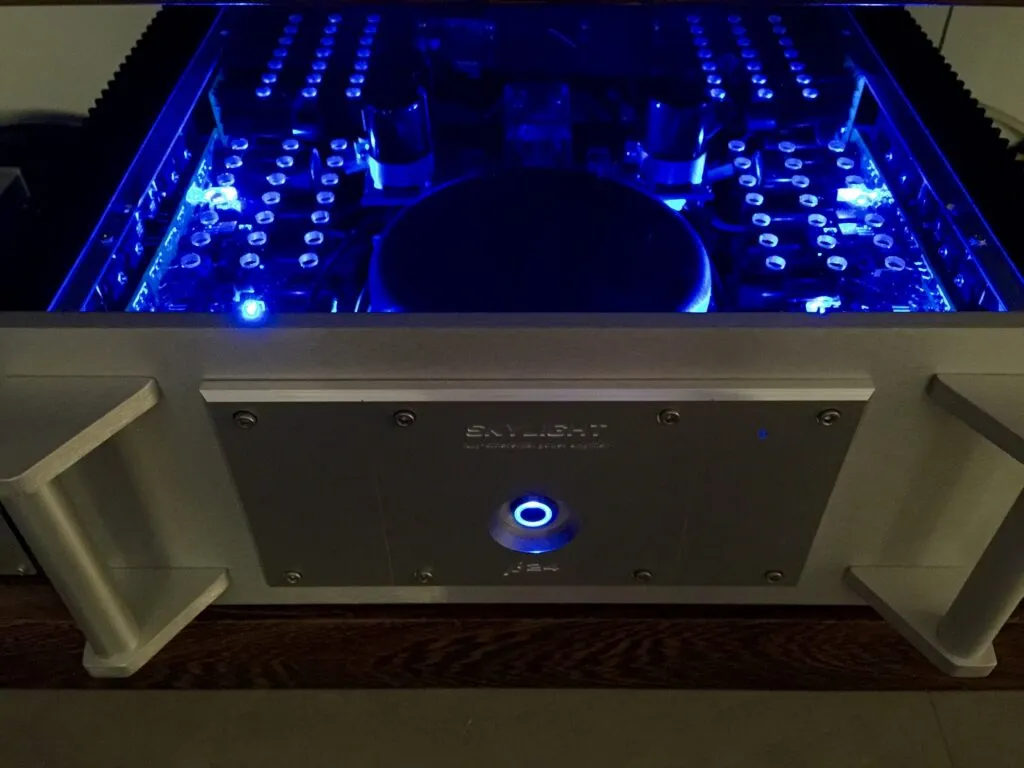
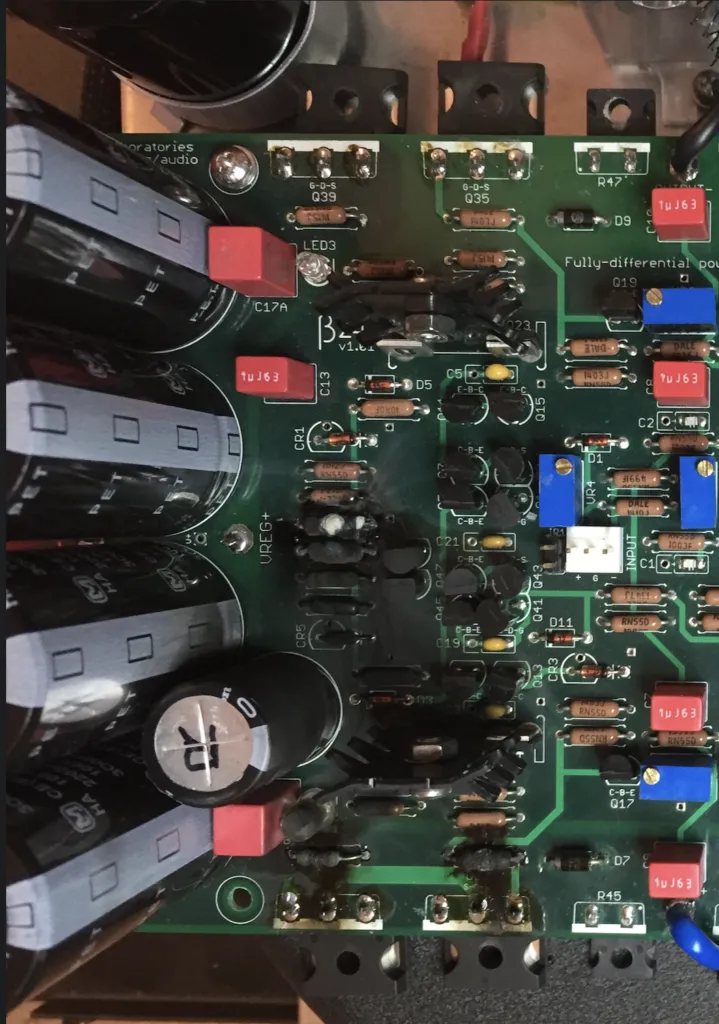
Before you dive into building a Beta24, you have to understand what you are getting into. It is a fully differential, fully balanced discrete power amplifier. In plain terms, it treats the positive and negative phases of the audio signal completely independently from input to output. It uses a complementary cascode input stage and heavy-duty MOSFET output stages.
But here is the catch that every builder needs to look squarely in the eye before buying parts: there is absolutely no short-circuit or over-current protection in the audio path.
Ti designed it this way intentionally. Adding protection circuits usually means putting components like sensing resistors or current-limiting transistors directly into the signal path, which can degrade sonic purity. The Beta24 prioritizes raw performance over a safety net. If something goes wrong downstream, the amplifier will not gracefully shut down to save itself, it will simply dump everything it has until something structural gives way.
You have to accept that risk going in.
1.2 // SOURCING LOGISTICS and LUGGAGE LIMITS
Sourcing the parts for a single Beta24 takes patience. You need tightly matched transistors, high-grade capacitors, and an absolute unit of a power supply.
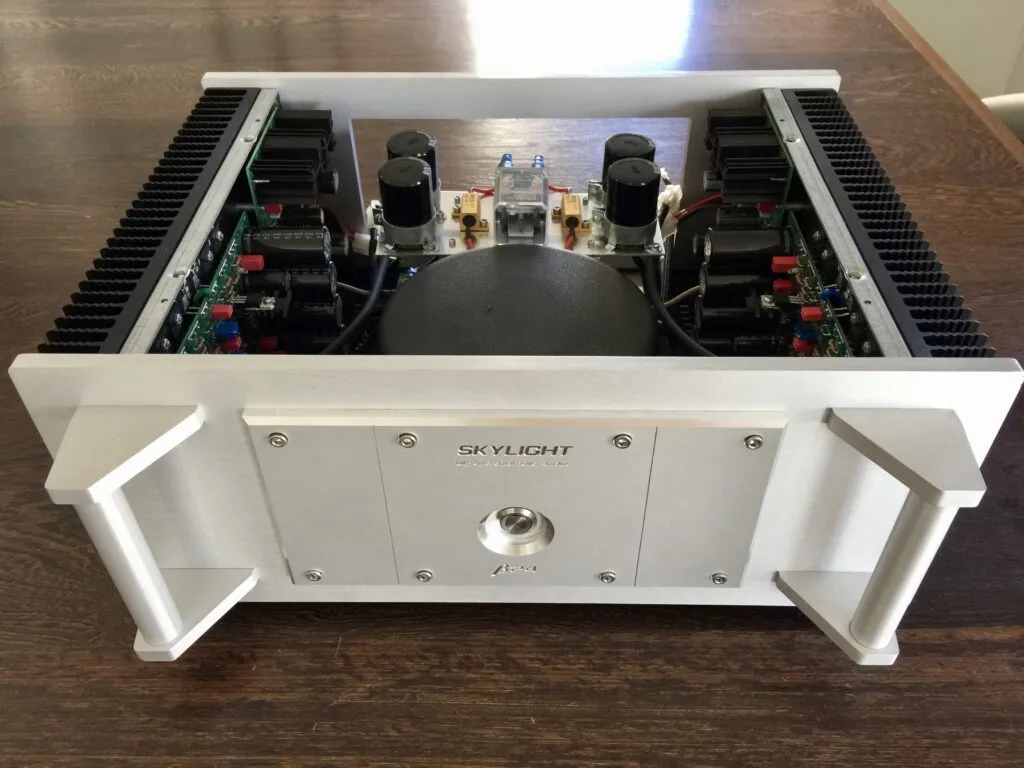
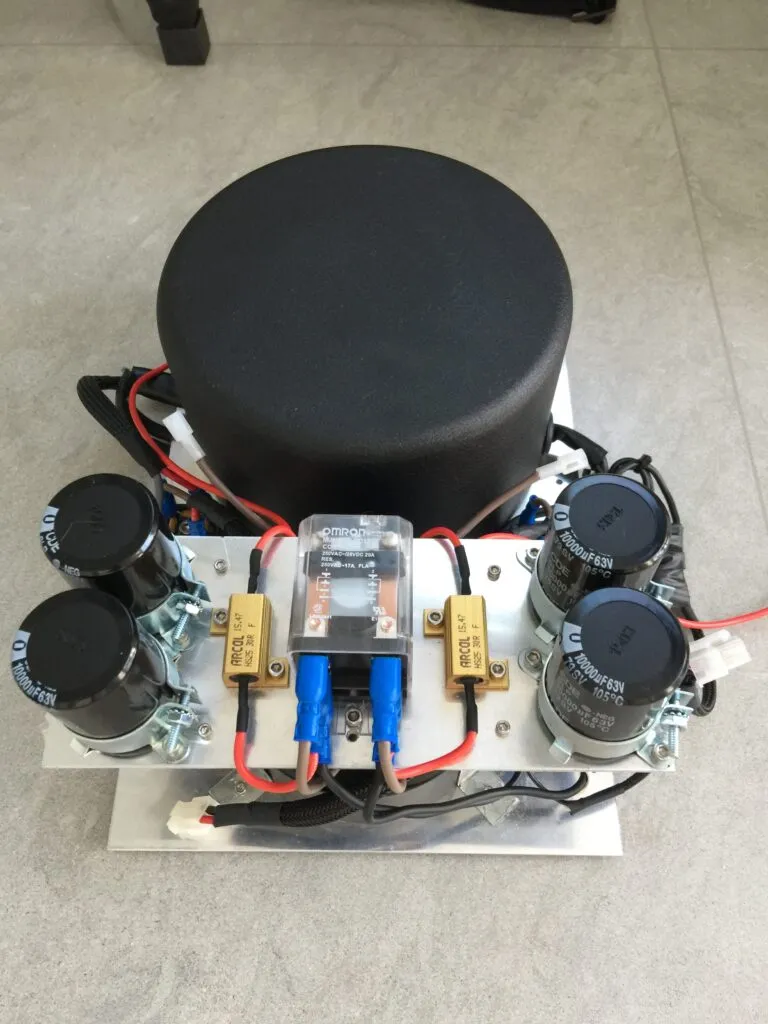
Speaking of the power supply: the dual-mono configuration requires a massive toroidal transformer to give each channel its own dedicated juice. I decided to buy the heavy iron while I was still in the US because it was much easier to source the exact specifications there. The problem was getting them back home. I ended up packing 14 kilograms (about 31 pounds) of raw transformer iron directly into my personal travel suitcase.
Dragging that suitcase across terminals was an absolute workout. When you are hauling that much heavy metal in your luggage just to build a power supply, you realize exactly how deep into the DIY rabbit hole you've gone.
1.3 // THE NIGHTMARE: CROSSING THE OUTPUTS

Every DIYer has a moment they wish they could take back. Mine happened during a testing phase on the workbench. While handling the live chassis, I accidentally crossed the output terminals.

Remember what I said about the lack of short-circuit protection?
The moment those wires touched, there was no warning beep or blown fuse. The board instantly went into a thermal runaway chain reaction. Within a split second, half of the discrete amplifier board burned down. Resistors charred, traces lifted, and silicon fried. It was a total loss for that channel.

The damage was too severe to even attempt a repair, so rebuilding the fried board was out of the question. I had to buy and build a completely new board from scratch. Because I had to source everything all over again for the replacement, I sourced more than I needed and ended up with an extra set of perfectly matched output transistors. I permanently keep them tucked away in my parts drawer now, my personal insurance policy just in case I ever need to service the unit down the line.
1.4 // ENGINEERING A WORKAROUND: THERMAL MOD

After assembling the new board and getting the amplifier healthy again, I realized I couldn't just leave it completely vulnerable to thermal meltdowns. While I didn't want to alter Ti's audio path design, I needed a safety net.

My solution was to install a thermal protection circuit. I installed a temperature-sensitive transistor directly onto the main heatsinks, close to the output transistors. This transistor doesn't touch the audio signal at all; instead, it acts as a dedicated monitor for the chassis temperature.

If the heatsink temperature ever spikes past a safe operational threshold, it instantly trips the heavy-duty relay that cuts the main AC power to the transformers. It's a simple, elegant workaround that gives me peace of mind without messing with the sonic purity of the differential circuit.
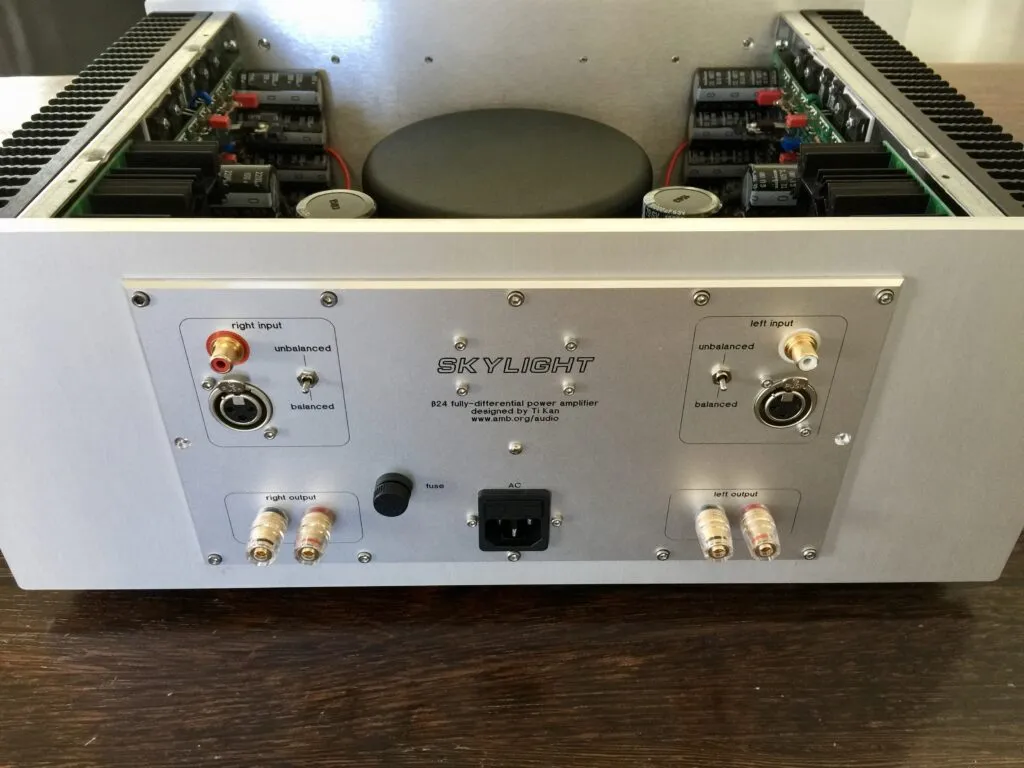
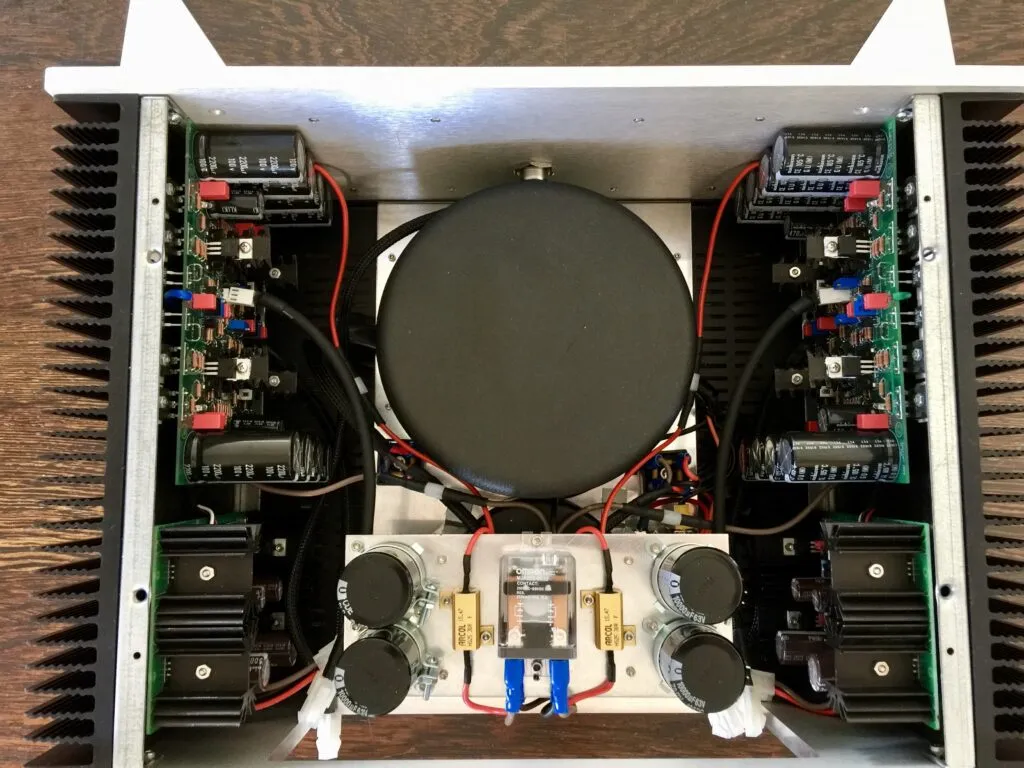
1.5 // WIRING, GROUNDING AND THE ULTIMATE PAYOFF

Once the boards were healthy and the safety mod was in place, the final stretch was all about mechanical assembly. Dealing with a dual-mono amplifier inside one chassis means you have a ton of high-current AC wiring running alongside sensitive input lines. I spent days routing, twisting, and shielding wires to ensure that the layout wouldn't introduce any ground loops or nasty hum.

The first clean power-up without smoke was a massive relief. The biasing process takes time, you have to let the amp heat up to its stable operating temperature, adjust the quiescent current, tweak the DC offset, and let it settle.

But when you finally hook it up to a source, the payoff is immediate. The first thing you notice is the background noise, or rather, the complete lack of it. It has an incredibly dark, silent noise floor. The control it exerts over speakers is effortless; the low end feels tight and immediate, and the soundstage has a clarity that makes all the stress, the heavy lifting, and the burnt silicon totally worth it.
2.0 // EPILOG: THE NEXT PHASE

Building a single Beta24 is a massive achievement on its own, and it served as the perfect reference point for my workbench. However, as these things usually go in the DIY world, you don't just stop when something works well.

Because my main listening setup relies on a pair of CBT-36 line arrays, which require strict active bi-amping for the mid-bass banks and the tweeter lines, one stereo unit wasn't going to be the end of the road. Having mastered the quirks, the dangers, and the layout of the first unit, I ended up building a second complete Beta24 to fully quad-amplify the system.

But that's a story for another day.