STATUS: COMPLETED
CATEGORY: VINYL
YEAR: 2019
THE MISSION: WARM UP THE RECORD
Building a Legend: My Dual-Chassis EAR 834 Replica
There is a specific kind of gravity surrounding the EAR 834P. Designed by the late Tim de Paravicini in the early 90s, the circuit hasn't really changed because it hasn't needed to. It's a deceptively simple three-tube architecture that manages to produce a sound far more expensive than its parts list suggests.
For a long time, I've wanted to see if the "magic" lived in the brand name or the circuit itself. I decided to find out by building a replica from the ground up, with a few modern corrections.

1.1 // THE FOUNDATION
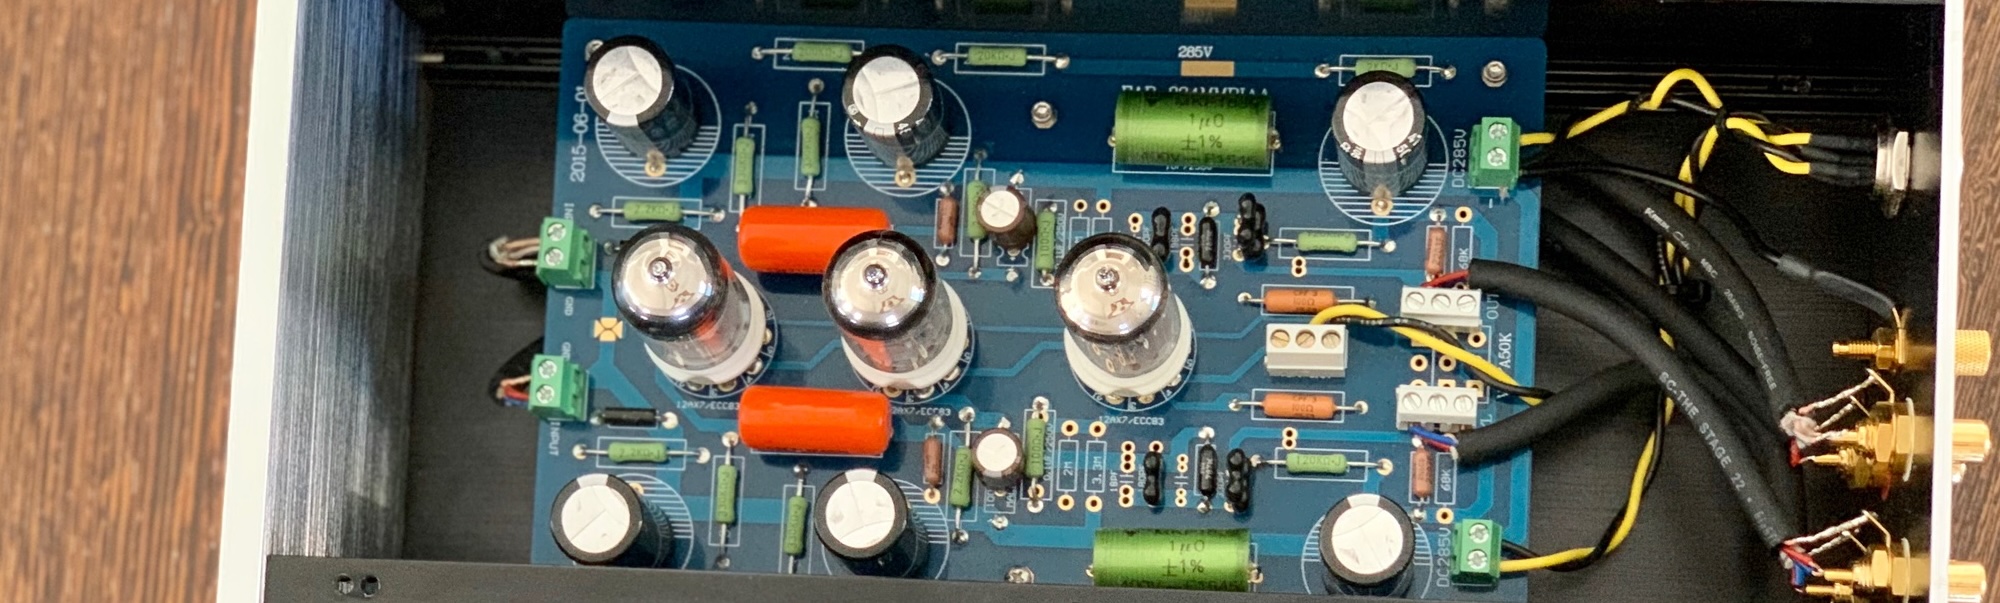
The heart of this build is a set of PCBs sourced from eBay. While the "purist" move is point-to-point wiring, these boards are well laid out and follow the classic EAR topology: two 12AX7s for the gain and RIAA equalization, and a third 12AX7 acting as a cathode follower to keep the output impedance low.
The goal wasn't just to clone it, but to address the common criticisms of the original retail units, specifically the noise floor and the "crowded" internal layout
Here is a rundown of the components I used:
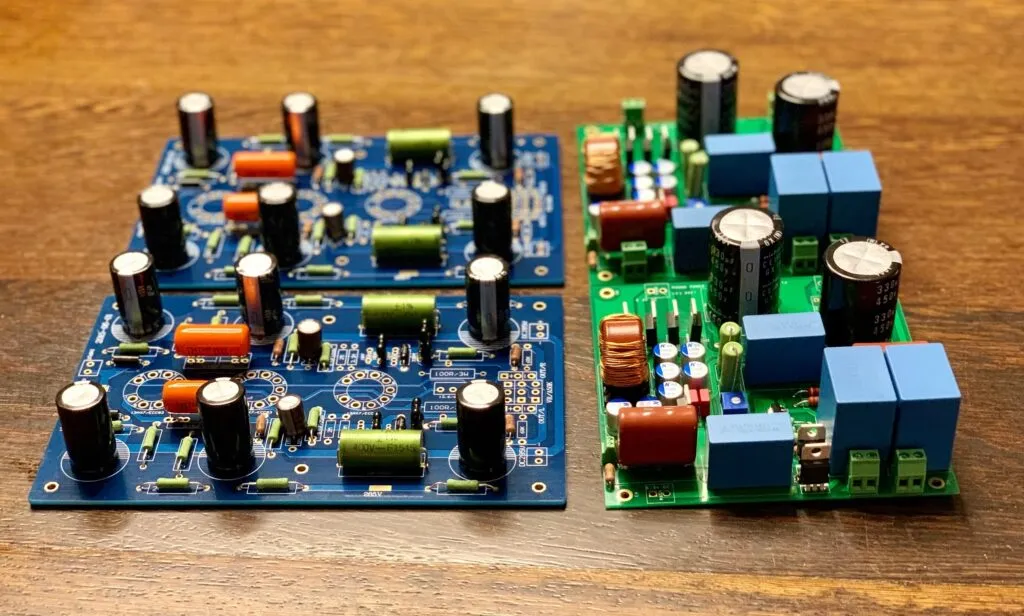
1. Main Board
2. Main board parts
3. Tubes (JJ ECC803s, Tung-Sol ECC803s, Mullard CV4004)
4. Power supply board
There is a complete 2 boards DIY kit with power transformer at this link. I am not sure of parts and board quality but it does seem like a cheap alternative.
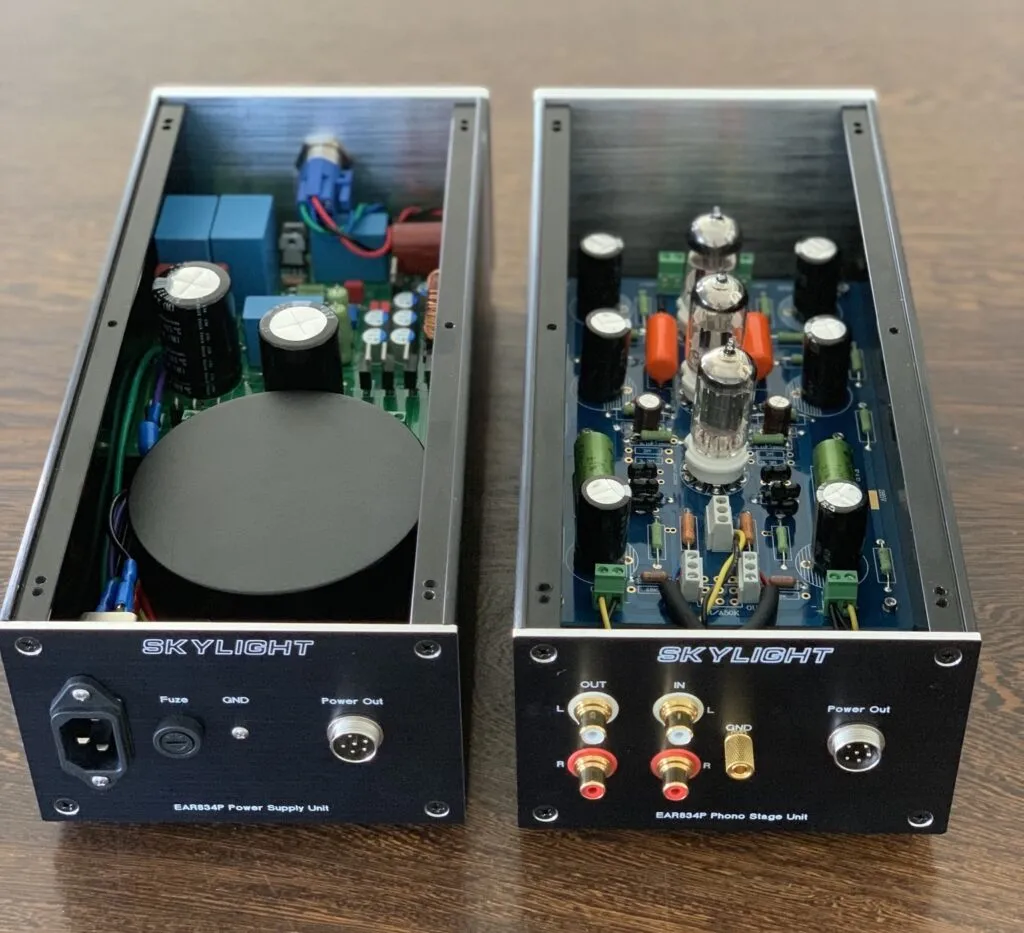
1.2 // THE TWO BOX SOLUTION
If you've ever looked inside an original EAR 834, you'll notice the power transformer sits uncomfortably close to the sensitive input tubes. In a high-gain phono stage, that's an invitation for 50Hz hum.
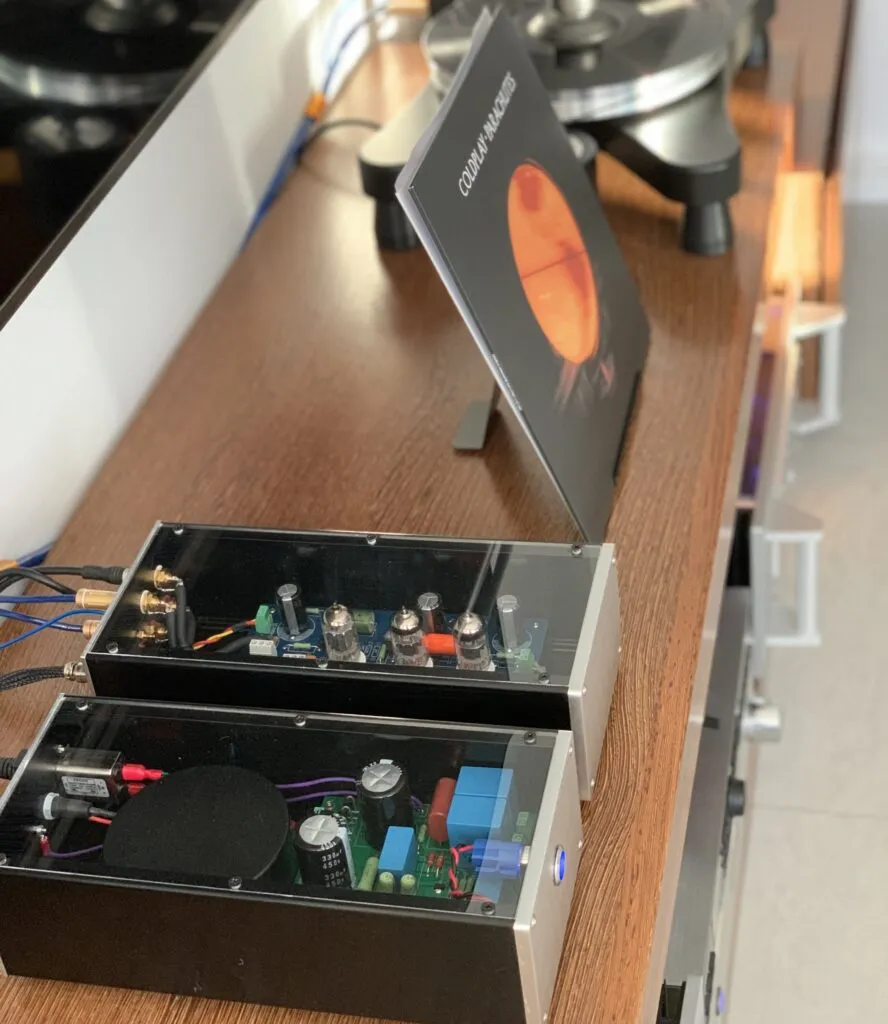
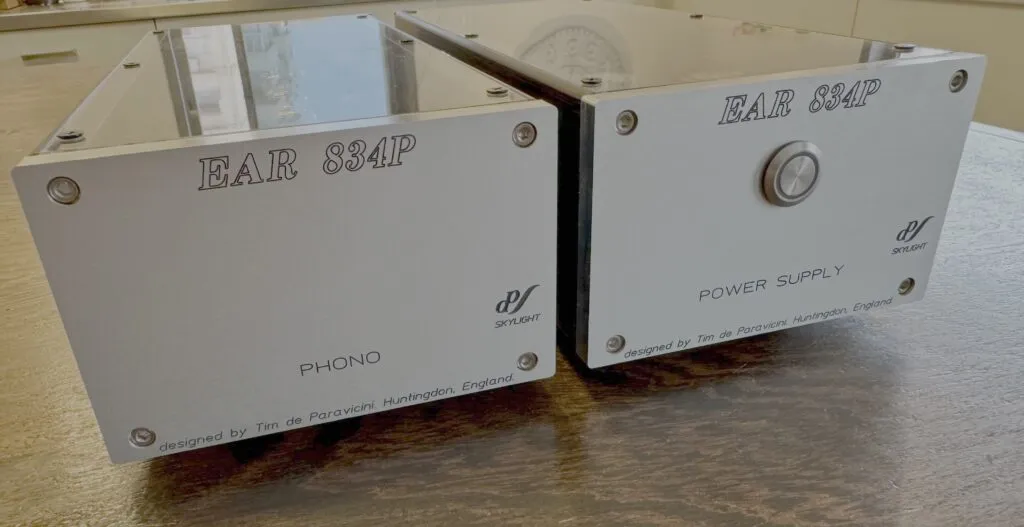
To solve this, I went with a dual-chassis design:
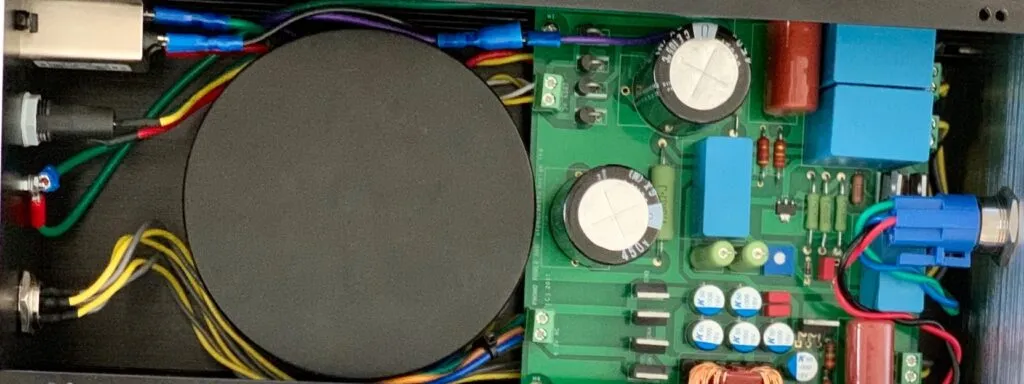
The Power Station: A dedicated enclosure for the toroidal transformer and the initial rectification.
The Signal Path: A separate, shielded enclosure for the RIAA board and the tubes.
Connecting them via a shielded umbilical cable keeps the "dirty" AC away from the "clean" audio signal. In testing, the silence between tracks is the first thing you notice; the background is "black," which allows the micro-details of the vinyl to emerge.
1.3 // LOW NOISE AND MICROPHONICS

When building a phono stage, the tubes are your greatest asset and your greatest liability. I specifically opted for tubes selected for Low Noise and Low Microphonics.

In the V1 position, the most sensitive part of the circuit, a microphonic tube acts like a microphone, picking up physical vibrations from the room or the chassis and amplifying them into the signal. By using screened, low-noise variants, I've managed to eliminate that "tube rush" and the "pinging" sound often associated with high-gain valve gear.

The result is a clinical level of quietness paired with that signature valve warmth.
1.4 // THE BUILD: AESTHETICS AND HEAT

I opted for a custom enclosure with a clear acrylic cover. Tube gear generates a fair amount of heat, and while the EAR circuit isn't a toaster, it benefits from airflow. Beyond the cooling, there's a certain satisfaction in seeing the glow of the filaments and the symmetry of the component layout through the transparent top.
d
During the assembly, I selected the best components I could find at a reasonable price. In an RIAA stage, the precision of the passive components in the feedback loop determines how "flat" your frequency response will be. If your capacitors are even 5% out of spec, the tonal balance of your records will shift.
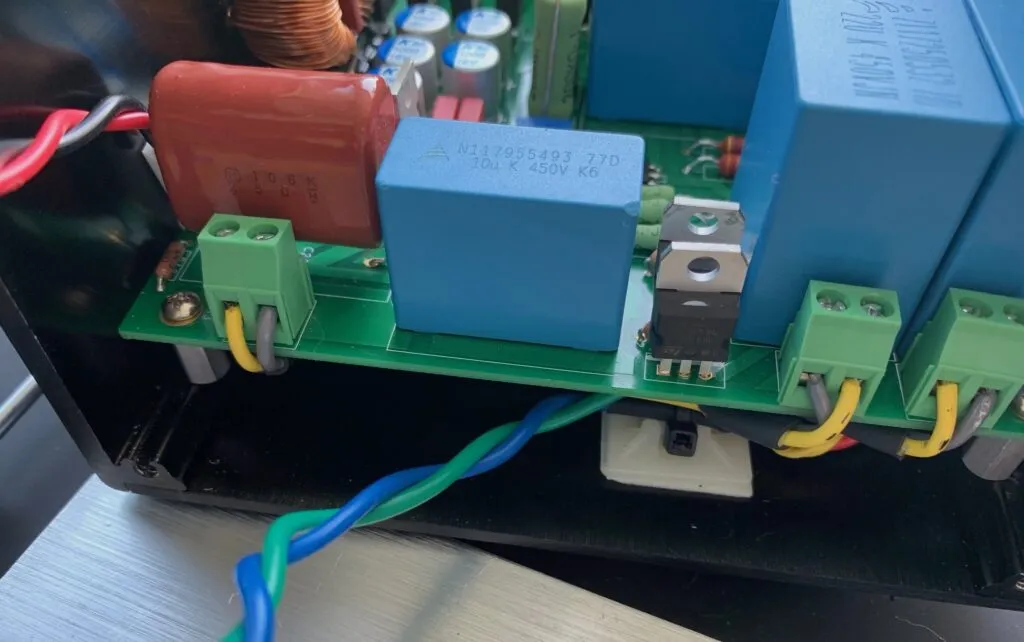
1.5 // OF POWER AND GROUND

Powering tubes requires a hefty voltage potential. The power unit produces a voltage of 280v to the main one and generates internally up to 360v. This is lethal and absolute care must be observed when handling the power unit built and test as well as triple validating the umbilical cords  that connect it to the main unit.

Even with two boxes, grounding a phono stage is an exercise in patience. I used a star-grounding scheme to ensure no ground loops were created between the PSU and the main board. It took a few tries to find the optimal point where the chassis met the signal ground, but the effort paid off.
1.6 // THE FIRST NEEDLE DROP

The EAR character was immediate. It has a "meat on the bones" sound that many solid-state stages lack. The bass is slightly warm, the midrange is liquid, and it handles complex orchestral passages without collapsing the soundstage.

Because of the low-noise tubes and the external PSU, the "inky black" backgrounds make the music feel more dynamic. The depth of the soundstage is massive, and the harshness on vocal sibilance is non-existent.
2.0 // FINAL THOUGHTS

The EAR character was immediate. It has a "meat on the bones" sound that many solid-state stages lack. The bass is slightly warm, the midrange is liquid, and it handles complex orchestral passages without collapsing the soundstage.

Because of the low-noise tubes and the external PSU, the "inky black" backgrounds make the music feel more dynamic. The depth of the soundstage is massive, and the harshness on vocal sibilance is non-existent.
Woh. this caught my interest. Any chance that this is available as a kit. Or that your fine work is published on e.g. GitHub. Would really like to take part in this.
This is a great project, one that delivers on its promise. I’ll ping you on Facebook and can send you more material
Ah I’d like more info on a kit?
I’ll add more info on how I sourced the parts, but I am not familiar with a ready made kit. This requires sourcing high quality parts so even if there was a kit, I’ll be opting for purchasing components