STATUS: COMPLETED (PRODUCTION GRADE)
CATEGORY: SEQUENCERS
YEAR: 2025
THE MISSION: UNIQUE RESURRECTION
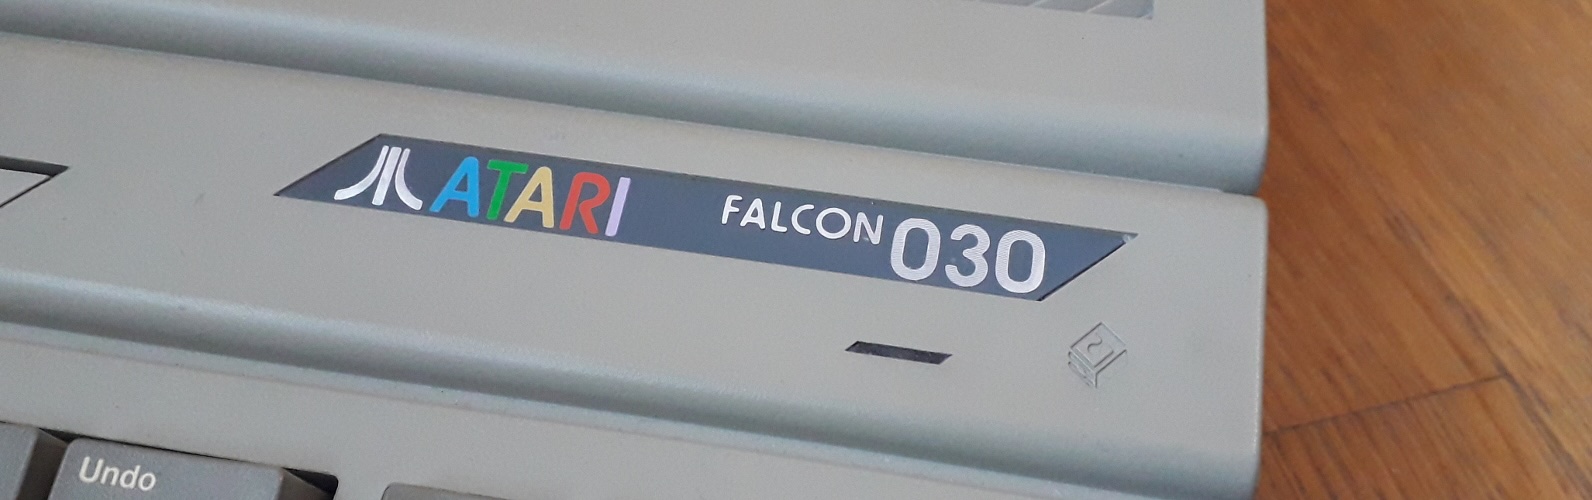
Creating Music with an Atari Falcon030
There is a specific kind of madness involved in avoiding a modern DAWs, with their infinite tracks, gigabytes of memory and vast library of VSTs, to center a studio around a machine from 1992. But if you know, you know.
The Atari Falcon030 isn't just another retro computer; it was the swan song of, at the time, a silicon giant, a machine designed explicitly with multimedia in its DNA. For the electronic musician, it remains a singular piece of engineering. It offers a workflow that demands discipline and a sonic character, specifically through its astonishingly capable DSP, that is difficult to emulate.
I have spent months building, stabilizing, and integrating a Falcon into my modern studio setup. It's not about nostalgia (well, admittedly to some degree, yes); it's about leveraging a unique technical architecture for creative output.
Here is how I turned this 32-bit relic into the beating heart of my production environment.
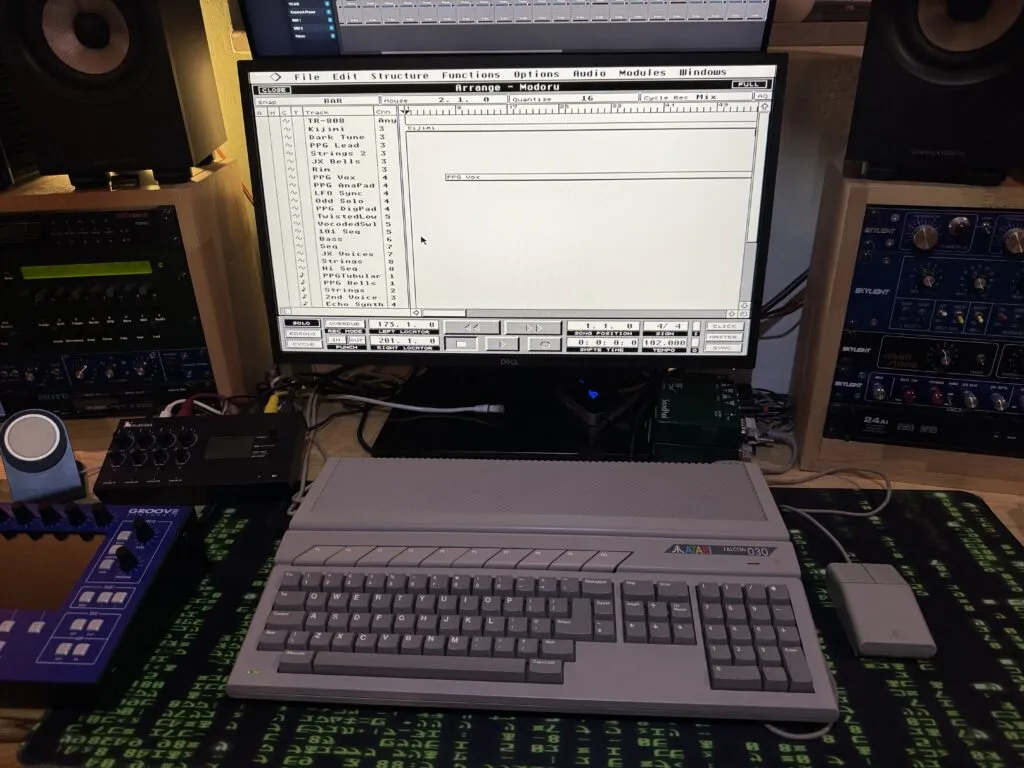
1.1 // A VINTAGE | MODERN STUDIO

Why bother in 2026? The answer lies in three letters: DSP.

Unlike its predecessors, the ST and STE, the Falcon shipped with a Motorola 56001 Digital Signal Processor running alongside its main 68030 CPU. In the early 90s, this was revolutionary. It meant the computer could handle real-time audio processing (EQ, delay, reverb) directly on the hardware without choking the main processor used for sequencing.

My setup utilizes the Falcon to handle 8 discrete channels of direct-to-disk audio recording and playback while simultaneously running tight MIDI sequencing. It's a hybrid approach. The Falcon is the tape machine, the effects rack, and the conductor. The constraints it imposes (track counts, processing headroom, user interface) force creative decisions that you simply don't have to make in Logic or ProTools.

It's technical limitation as an artistic catalyst.
1.2 // TO FIND A FALCON
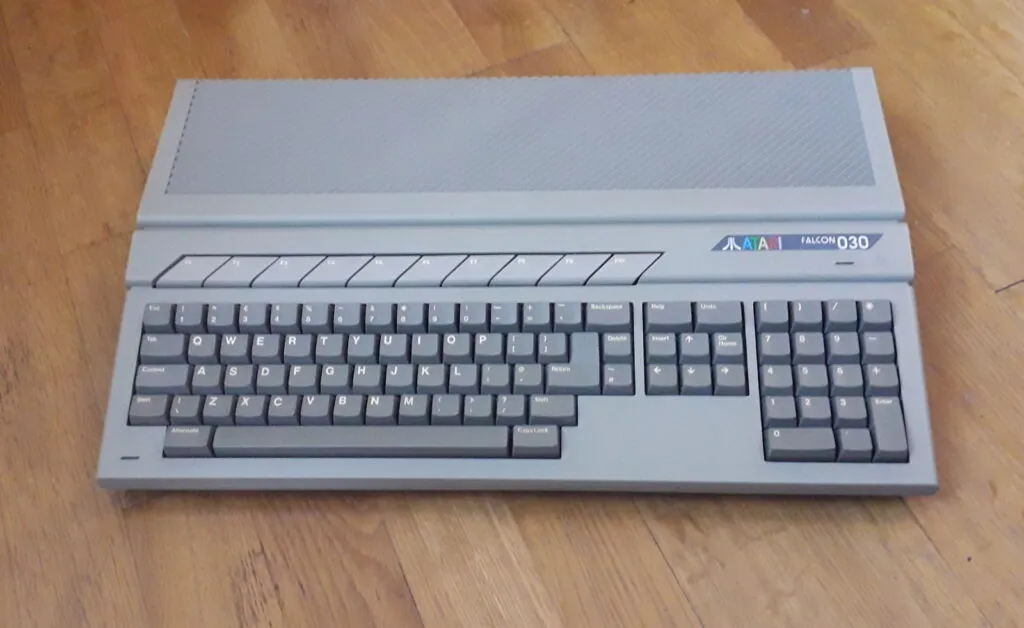
Acquiring a Falcon today is an exercise in patience and wallet resilience. They were not produced in high numbers before Atari collapsed, making them significantly rarer than Amigas of the same era.
You are entering a seller's market. Prices for a working base unit have soared, often-time going for as much as $2,500. When hunting on eBay or specialized retro forums, you may see relatively good cosmetic condition and you will want to focus on the motherboard and included upgrades / fixes.
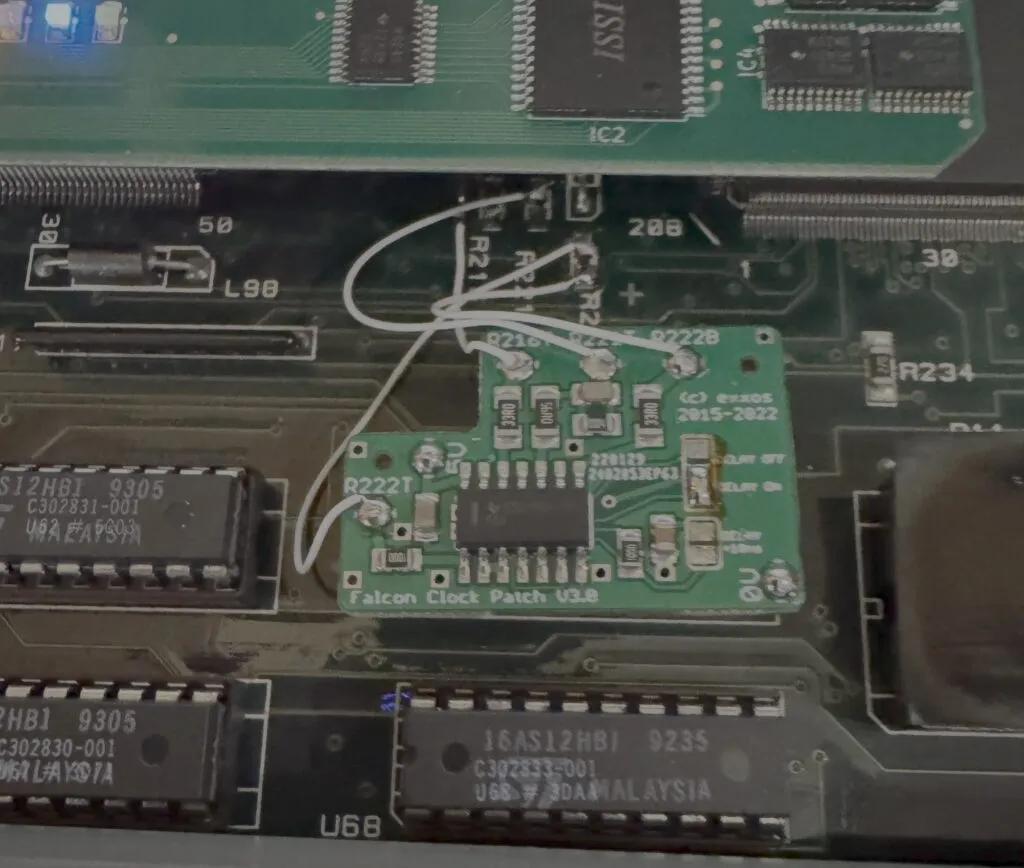
Crucially, ask about the board revision and whether any patches where installed. Early Falcons suffered from significant clock skew issues on the bus, leading to unstable SCSI and audio performance, a death sentence for a music machine. While these can be patched (see below), buying a later revision board or one already serviced by a reputable technician is preferable. You are looking for stability above all else.
1.3 // TO MOD A FALCON

A stock 4MB Falcon is a museum piece; it is not a studio tool. To run serious audio applications, you must pop the hood and commit to upgrades.

The Memory Floor: 14MB of RAM is the non-negotiable standard for audio work. This is the maximum official memory the Falcon chipset addresses.

You need this headroom for sample buffers and operating system overhead when Cubase is running heavy.

The Foundation Patches: If you landed an earlier board revision, the "clock patch" is mandatory. Without it, data corruption on your hard drives when streaming audio is almost guaranteed.

Furthermore, replace the NVRAM/Real Time Clock immediately; a dead battery here leads to endless boot headaches.

The OS: Stick to TOS 4.04. It is the most stable official ROM OS for the machine and essential for reliable Cubase Audio operation, as it will not work with anything else.

While accelerators like DFB1/X or CT60 exist to turn the Falcon into a speed demon, for pure audio DSP work, a highly stabilized stock 68030/DSP configuration is often less headache-inducing.
1.4 // CHOICE OF SOFTWARE
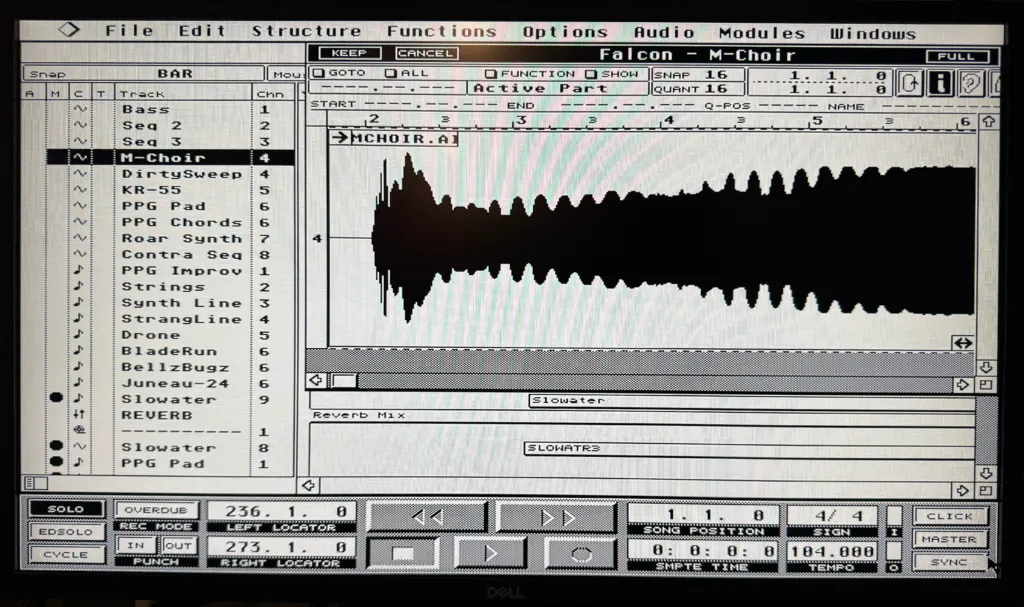
In this ecosystem, there is only one king: Steinberg Cubase Audio.
This was the software that proved Steinberg really understood the Falcon's architecture. It integrates tightly with the Motorola DSP, offloading effect processing so the 68030 can handle the GUI and MIDI timing. It offers 8 tracks of digital audio alongside superb MIDI sequencing.
Finding it today is tricky. Original dongles are practically unobtainable and expensive. A Cubase Audio complete package usually goes on eBay for $350. The community relies largely on "liberated" versions of Cubase Audio 2.06, however I have purchased my Cubase package as I feel better owning the software I use.
1.5 // THE MISSING LINK: STORAGE ARCHITECTURE
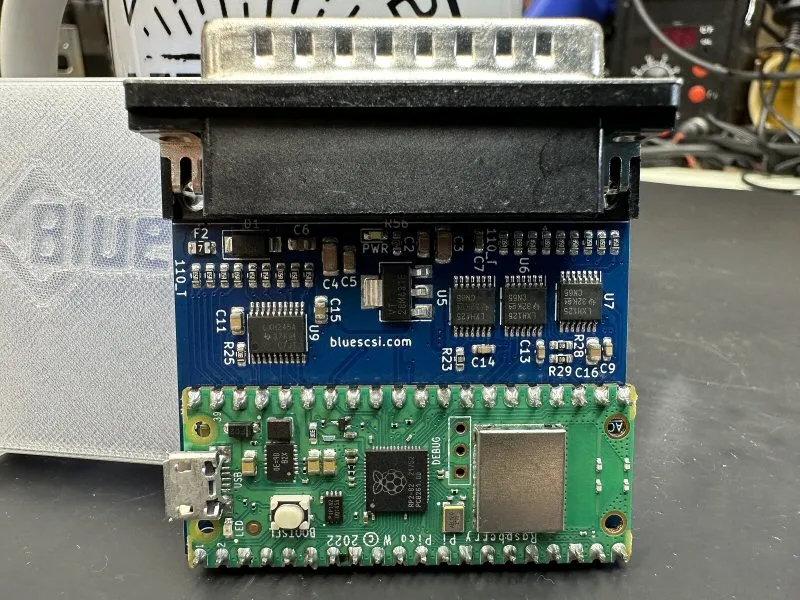
This is the most technically demanding part of the build. The Falcon's native IDE interface is painfully slow and Cubase Audio was not design around it; SCSI is the only viable path for multi-track audio streaming.
For primary storage, mechanical drives are a liability. I use a BlueSCSI device, which emulates a SCSI hard drive using an SD card. It is silent, fast enough to saturate the Falcon's SCSI bus, and reliable.
However, we hit a hard ceiling: TOS 4.04 can only handle partitions up to 1GB.
This requires rigorous data discipline. My BlueSCSI SD card is sliced into multiple 1GB partitions using HDDriver, the definitive utility for Atari hard disk management. I dedicate specific 1GB partitions entirely to current audio projects to ensure seek times stay low and fragmentation is minimized.
For archival and backups, I've integrated a vintage Iomega Jaz drive. With 2GB cartridges (partitioned into two 1GB slices), it provides a satisfyingly physical, "tape-like" methodology for archiving finished sessions off the main system.
1.6 // INTERFACING: THE OUTSIDE WORLD
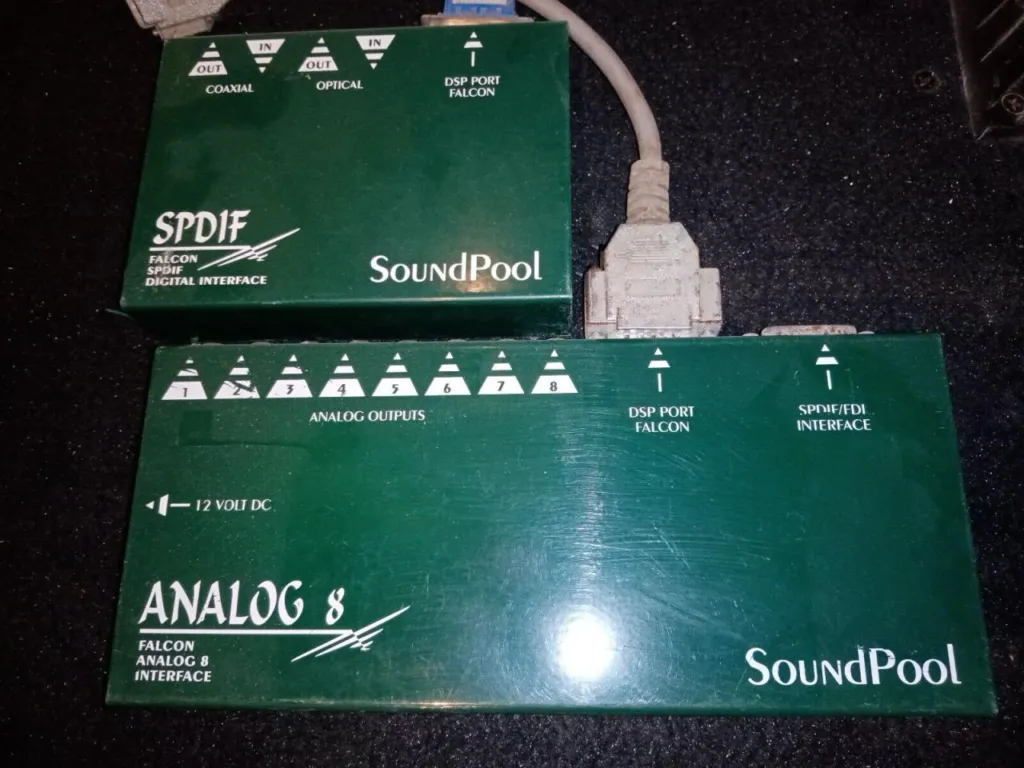
Getting high quality audio in and out of the Falcon's proprietary connectors requires specialized, rare hardware.
Audio I/O: I rely on SoundPool interfaces. The Falcon's internal AD/DA converters are okay for grit, but for serious work, you need digital I/O. The SoundPool SPDIF interface allows me to bypass the internal converters entirely, keeping the signal path pristine until it hits my modern RME interface.
For sending 8 audio channels to my mixing desk, the SoundPool Analog8 adds necessary inputs.
MIDI I/O: The Atari ST line is legendary for tight MIDI timing due to its built-in ports. The Falcon continues this, but for a studio full of hardware, I needed more. I use the Steinberg MIDEX+. This expands the system to an additional 4 MIDI Outs and 2 MIDI Ins. Crucially, Cubase communicates directly with the MIDEX+ hardware, ensuring rock-solid clocking even when the CPU is under heavy audio load.
2.0 // CREATING THE FINAL MIX
The workflow is cyclical and disciplined. I sequence external hardware via the MIDEX+, committing the best parts as audio recordings onto the BlueSCSI's dedicated audio partitions.
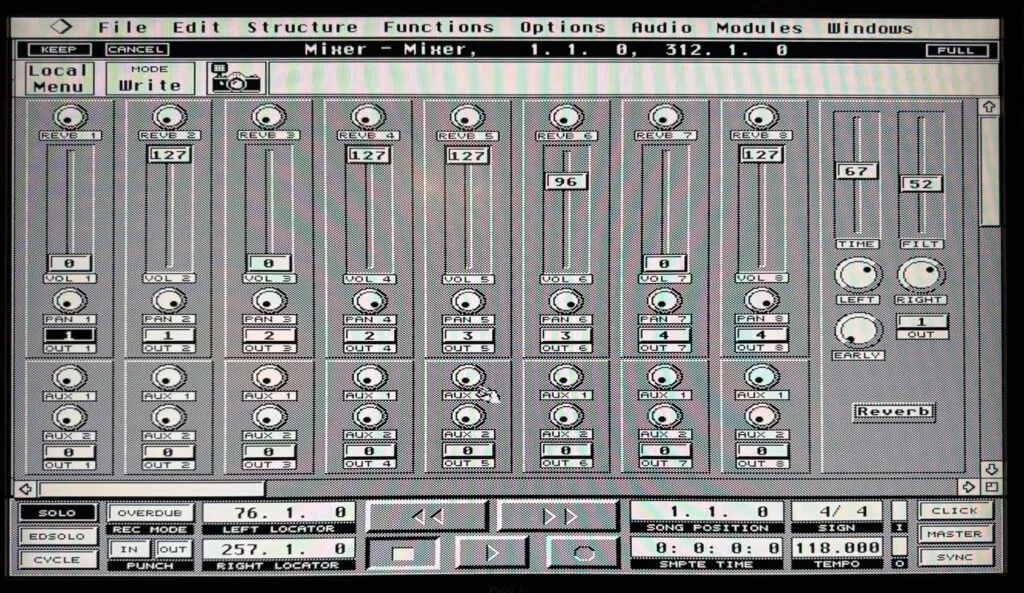
Mixing in Cubase Audio on the Falcon is a tactile, deliberate process. You need to decide whether you need EQ, Reverb or Compressor in Cubase, but you can have only one type as the DSP receives just one effect code.
For the final mixdown, I started mixing inside Cubase, applying reverb for spatial positioning but once I added the SoundPool Analog8, I am sending 8 analog tracks to my mixing console and am mixing with the other MIDI instruments. For audio level automation I use Cubase digital mixer module while MIDI volume automation is traditionally done using control change messages.
My latest album, which is in its final composing and mixing stages was done exactly as I had described above.
The result is music that retains the digital crispness of the early 90s, born from a process that demands technical mastery of the machine.