STATUS: COMPLETED
CATEGORY: EFFECTS
YEAR: 2014
THE MISSION: ANALOG RECREATED
Building the Ultimate DIY 51x & 500 Series Analog Rack
From my early days as a recording and mixing engineer, I fell in love with the outboard gear from legendary companies like API, SSL, UREI, and Neve. It wasn't just about the satisfying, tactile experience of turning a physical knob; it was the sheer size of the sound. The analog warmth, the headroom, and the distinct character-you could instantly hear the difference when patching a signal from a punchy API preamp into a silky Neve EQ.
As I transitioned to a home studio environment, I tried to recreate that magic in the box. But even the best software emulations, meticulously modeled after analog classics, often fell short. They lacked that final 5% of non-linear character and the joy of hands-on, physical routing.
I needed real iron, real voltage, and real knobs. But I also needed it to be affordable. When I discovered the lunchbox format and the DIY 51x Allianceproject, I knew I had found my holy grail.
Here is the story of how I built my own 11-space analog dream machine.
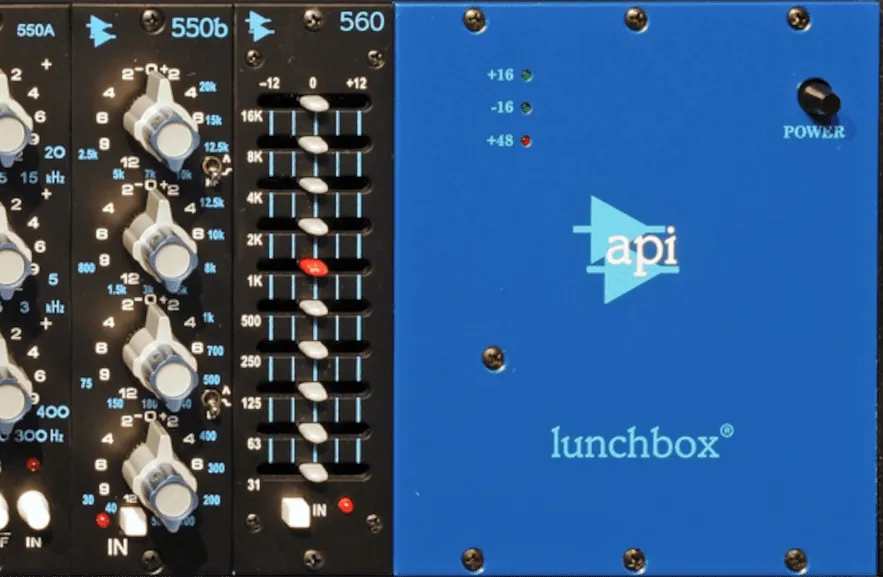
1.1 // 500 SERIES FORMAT EXPLAINED

If you are new to outboard gear, you might be wondering what a "lunchbox" is. In the 1970s, Automated Processes Inc. (API) created modular recording consoles. To make the channels easily swappable and serviceable, they designed their preamps, EQs, and compressors as interchangeable cassettes that slid into a standardized frame.

Eventually, API released a standalone, portable chassis that held a handful of these modules, affectionately dubbed the "lunchbox." Today, the 500 series format is an industry standard. It allows engineers to mix and match modules from hundreds of different manufacturers-compressors, EQs, preamps, and saturators, all sharing a single power supply and a compact footprint.
1.2 // TAKING THE DIY ROUTE
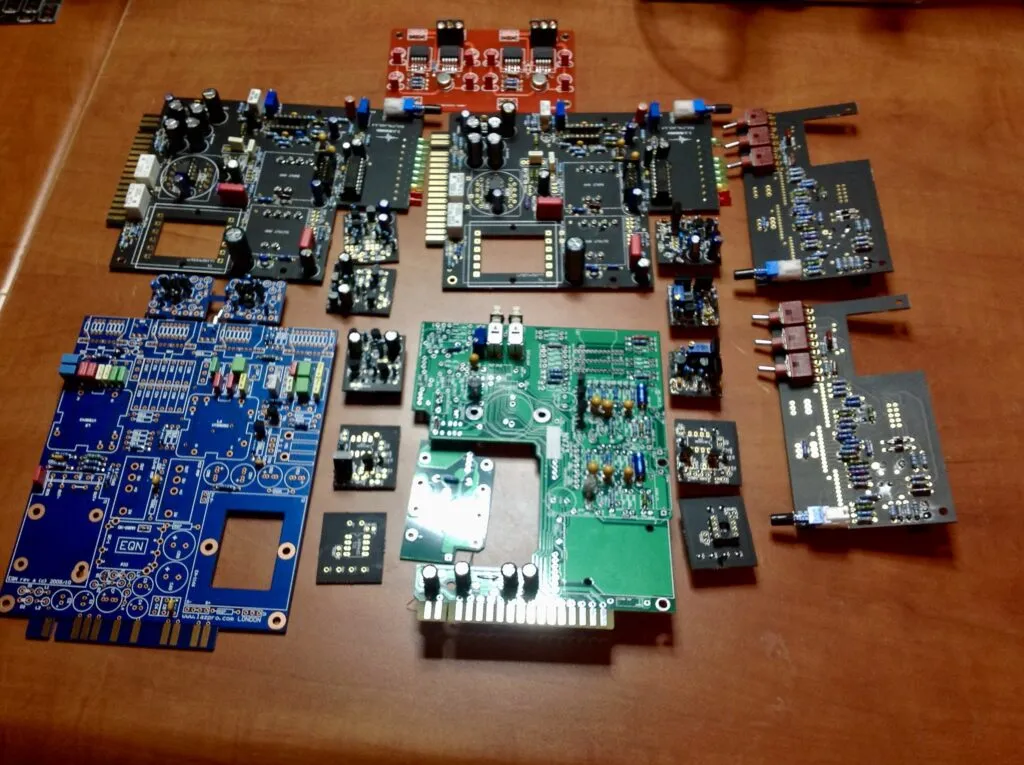
Let's be honest: genuine vintage modules, or even modern boutique reproductions, are incredibly expensive. I didn't have the budget to drop thousands of dollars per channel.
Instead, I opted to build them myself.
Navigating the world of DIY audio, I found a vibrant community of engineers and tinkerers.
Building the gear myself solved two problems: it drastically cut the cost, and thanks to the modular nature of the format, I didn't have to build it all at once. I could start with a stereo pair of preamps and slowly expand my rack over the years.
1.3 // THE QUEST FOR HEADROOM: 51X ALLIANCE

While standard 500 series racks are great, they have a technical limitation for vintage purists: standard 500 series racks operate on +/- 16V power rails.

Many of the legendary vintage circuits (like early Neve and API designs) originally ran on 24V rails. Running a 24V circuit on 16V power means sacrificing headroom and altering the way the circuit clips and saturates.

This is where the 51x Alliance comes in. Born out of the GroupDIY community, the 51x format uses a specialized 11-space rack and power supply that provides standard +/- 16V rails and additional +/- 24V rails. This allows builders to create exact, 1:1 replicas of vintage circuits with zero compromises in headroom or transient response.
1.4 // A TRIBUTE TO IGOR KAPELEVICH

You can't talk about the golden era of DIY 51x gear without mentioning Igor Kapelevich, the mastermind behind I.J. Research. Igor was a legendary figure in the DIY community who engineered incredibly complex, high-fidelity PCB layouts for classic gear.

His designs brought mastering-grade equipment to the masses. He collaborated with top-tier mastering engineers to refine his circuits, creating accessible builds for legendary bus compressors and mastering EQs.

One notable example his this highly complex analog Mastering Transfer Console (the K-1) built for Bob Katz.

Having Igor's boards in your rack was a badge of honor. His tragic passing left a massive hole in the DIY community, but his legacy lives on in the racks of countless engineers worldwide.

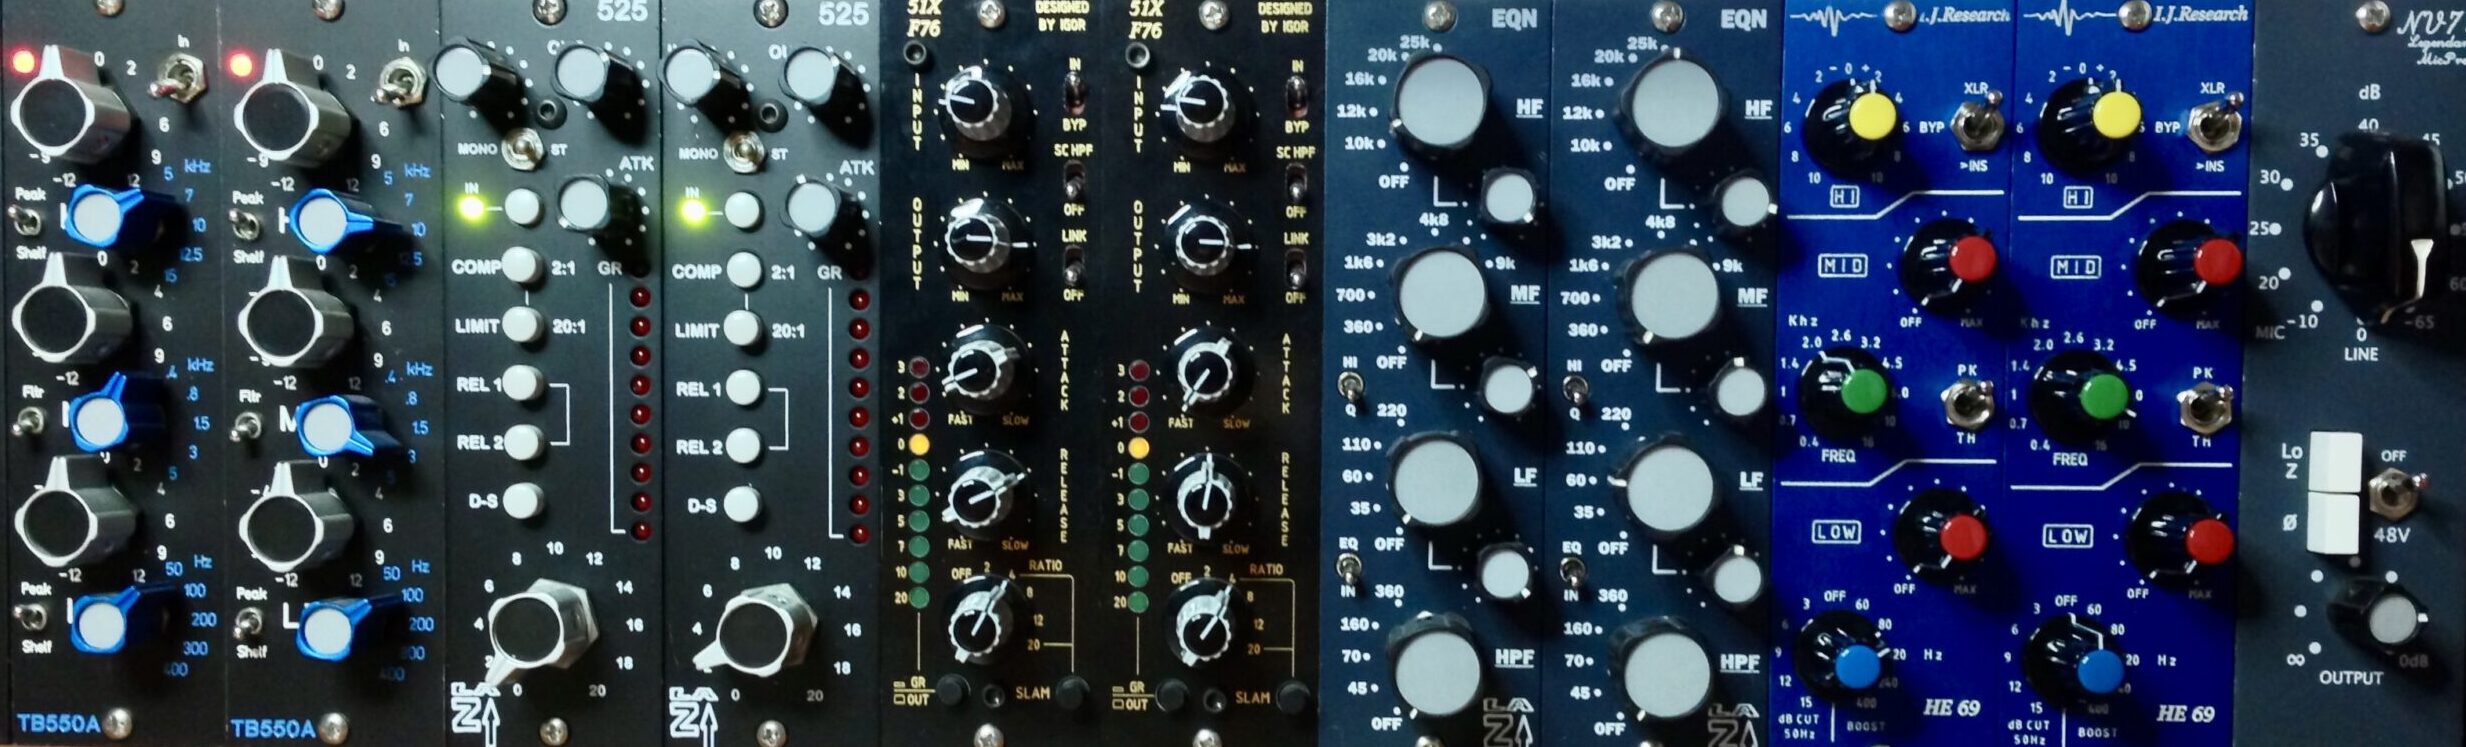
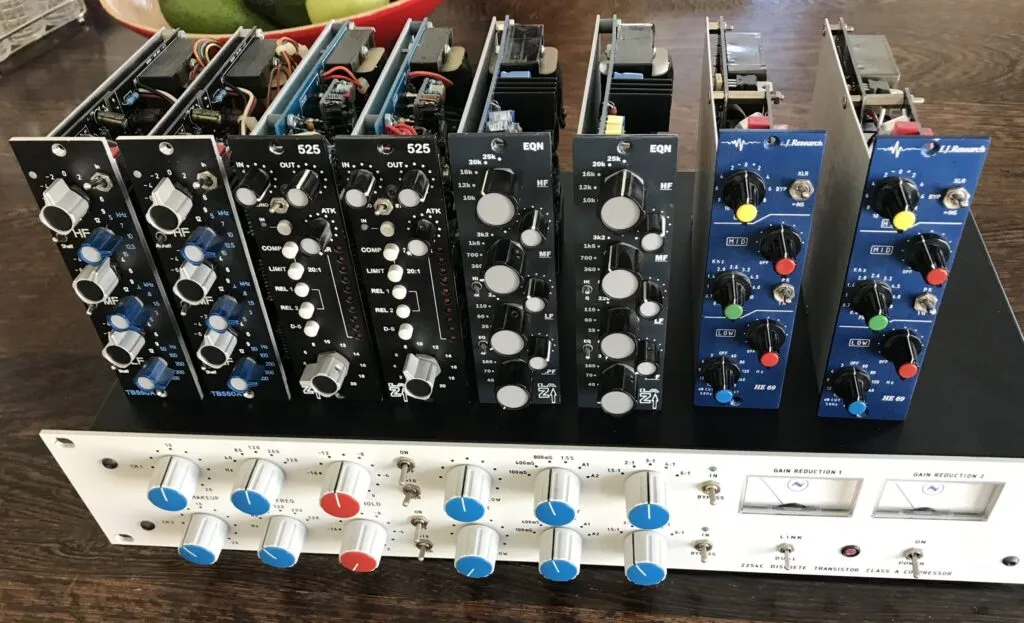
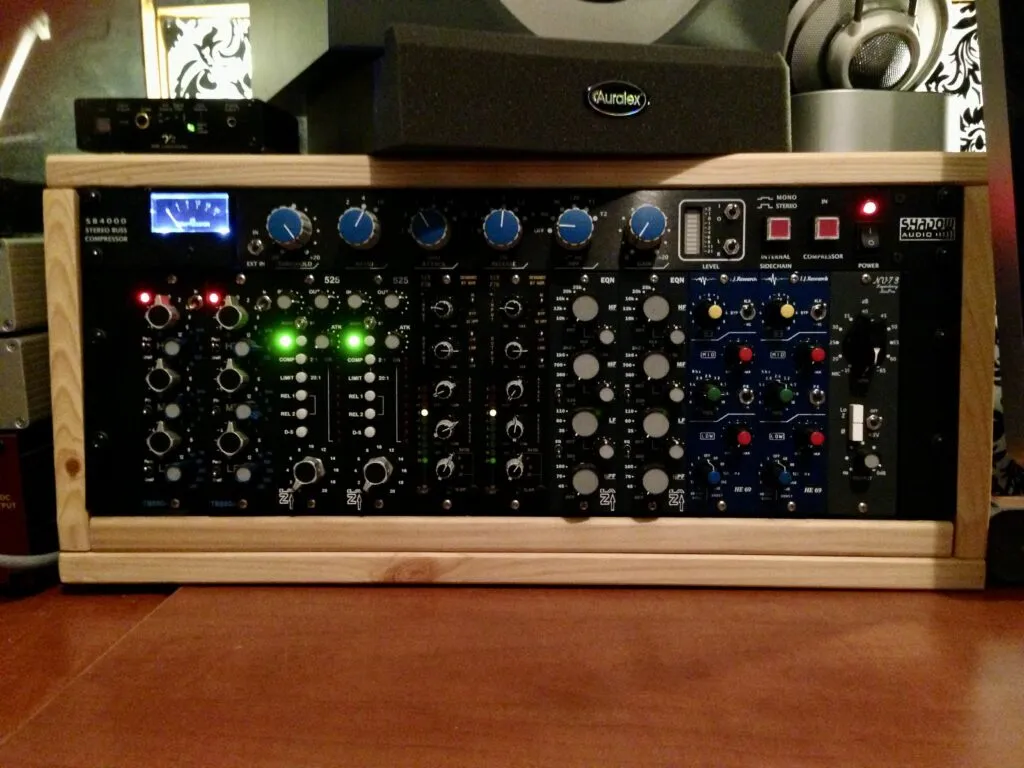
1.5 // INSIDE MY RACK 1
My goal was versatility. I wanted diverse colors for tracking and stereo pairs for bus processing. Instead of just filling slots, I carefully curated modules based on the distinct sonic heritage of each legendary circuit. Here is what I chose to build:
API-Style EQs & Compressors: Modeled after the classic 500-series modules from the 1970s, these circuits rely on discrete op-amps (like the famous 2520) and a "Proportional Q" design that narrows the EQ bandwidth as you boost or cut, giving them a famously aggressive and tight character that practically defined American rock and roll.
Neve-Style EQs: Renowned for their broad, highly musical curves and inductor-based mid-bands, these British-style EQs add a silky, undeniably rich harmonic density that flatters everything from harsh vocals to thin basslines.
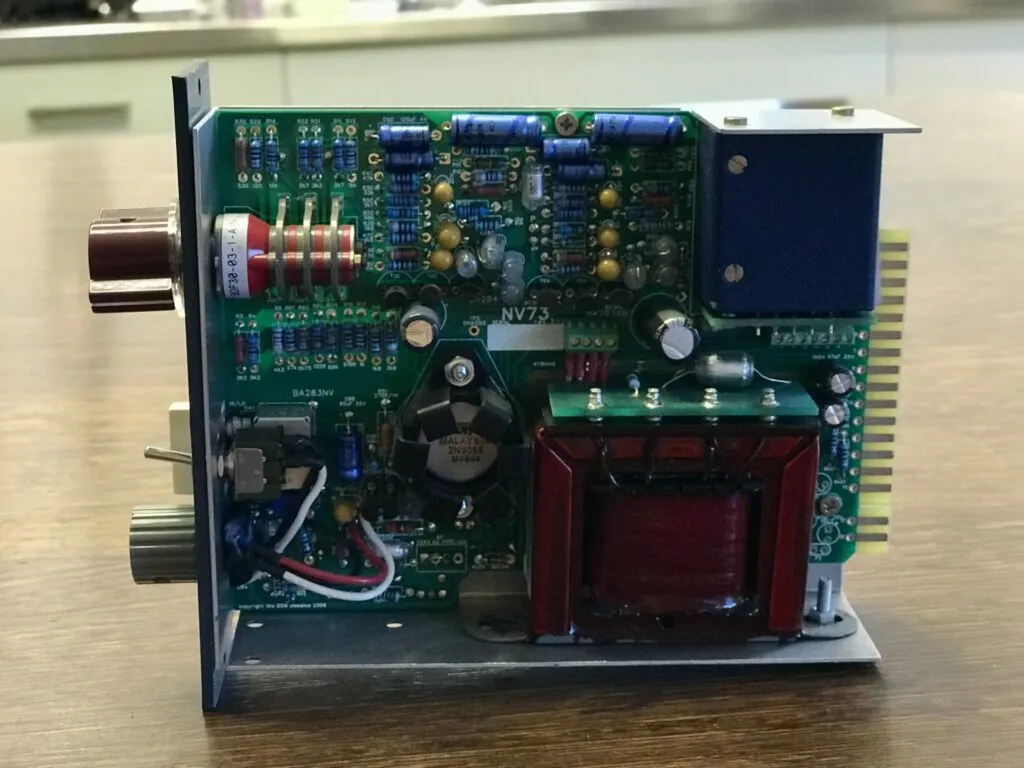
NV73 Neve-Style Preamp: Modeled closely after the legendary Neve 1073 preamp stage, this Class-A circuit is the undisputed king of rock vocals and snare drums. It utilizes massive, Marinair-style input and output transformers to deliver that iconic, larger-than-life "British iron" saturation, adding subtle harmonic distortion that makes tracks sit perfectly in a mix without needing heavy EQ.
Helios Console EQ: Hailing from the legendary Olympic Studios and famously used on classic records by The Rolling Stones, Jimi Hendrix, and Led Zeppelin, this passive/active hybrid EQ (like the classic Type 69) is highly prized for its wildly musical, phase-coherent sweeps and uniquely sweet, open top-end.
1.6 // INSIDE MY RACK 2

F76 FET Compressors: Modeled after the classic solid-state UREI 1176 for aggressive, lightning-fast peak control. Using a Field Effect Transistor (FET) for gain reduction allows for attack times measured in microseconds, making this the ultimate tool for pinning a lead vocal to the very front of a dense mix or smashing drum room mics for explosive energy.

I built two of everything. This provided redundancy, but more importantly, it allowed me to process stereo stems, drum overheads, and my mix bus.

Expert Tip: Components Matter A circuit schematic is only half the battle. The true "legacy sound" relies heavily on the physical components. Getting original (or accurate replica) audio transformers (like Carnhill, Cinemag, or Edcor) and inductors will make or break your module. For the rest of the board, using high-quality metal film resistors and WIMA capacitors ensures a low noise floor and pristine signal transfer.

To complete the illusion, I made sure to have authentic front panels, graphics, and knobs.

Turning an exact replica of a Marconi knob makes the experience feel as authentic as it sounds.

1.7 // THE MODERN DIY LANDSCAPE

When I was building my rack in 2012-2014, the DIY audio scene was in a golden age. You could log onto GroupDIY.com and find endless active builds, diagnostic threads, and a bustling white-market for PCBs and hard-to-find components.

Revisiting those old bookmarks today is a bit melancholic; many of those small, independent operations have gone offline. However, the DIY spirit is far from dead. If you are looking to start a build today, here are the heavy hitters that are still providing incredible kits:

DIYRE (DIY Recording Equipment): A great starting point for beginners. Incredible step-by-step visual manuals and the highly versatile "Colour" format.

CAPI (Classic Audio Products, Inc.): The absolute holy grail for punchy, mid-forward API-style sound.

Sound Skulptor: A fantastic European company offering beautiful kits (especially their Neve clones) with highly detailed instructions.

Hairball Audio: Famous for their FET compressors and massive-sounding, clean preamps.

AML (Audio Maintenance Limited): No-compromise vintage British sound. They are also a premier source for high-quality transformers and inductors.
1.8 // POWERING THE BEAST

Building a 51x rack requires a robust, linear power supply. Unlike a standard 500 series rack, a 51x PSU must deliver +/- 16V, +/- 24V, and +48V for phantom power.

A quick safety warning: While building the modules is safe (they operate at low DC voltages), building the power supply means wiring standard 120V/240V mains power to a large toroidal transformer. If you do not have experience with mains electricity, buy a pre-built PSU or get a qualified tech to wire the AC side for you.

With hefty heat sinks to dissipate the heat and a massive toroid to ensure clean power, the 51x power supply is heavy, warm, and the beating heart of the rack.

1.9 // THE VERDICT

Absolutely. Standing back and looking at a fully populated 11-space rack of legendary studio tools, knowing I soldered every resistor and seated every op-amp myself. is a profound achievement.

But the real reward is the sound. I have used this 51x rack on countless mixes and albums. It breathes life, warmth, and unmistakable character into digital tracks. Having that vintage studio legacy quite literally at my fingertips has elevated my work and brought the joy of analog mixing back into my daily routine.